You finish cleaning a driveway, pack the equipment, and take one quick photo before leaving. The result looks good, but there is no matching “before” image. A potential customer sees a clean driveway without understanding what changed.
The same routine that produces good photos—documenting the job before, during, and after—can also produce a recording you use to train your team.
Learning how to take pressure washing before and after photos starts with planning, not expensive equipment. Choose repeatable camera positions, capture the same surface, and explain the work behind the result.
This guide covers phone settings, three essential views, the half-clean shot, comparison layouts, short captions, and tracking. The goal is to help local customers recognize your service and take a clear next step.
Choose a job that represents your service
Choose a project that answers a customer’s practical questions:
- What surfaces does this business clean?
- What changed during the job?
- Is this similar to my property?
- Does the business serve my area?
- How do I request a quote?
A driveway comparison suits homeowners. A storefront entrance may be more relevant to a commercial property manager.
Describe the service accurately. If the result involved additional treatment or work beyond your normal package, explain that difference.
A dramatic transformation is useful only when it represents work your team can deliver. A less dramatic project with clear photos and a specific explanation can still make a strong portfolio entry.
Before photos protect your business
Take before photos on every job, including projects you will never publish.
They create a record of visible conditions before work begins: existing cracks, stains, chipped edges, damaged joints, or other concerns. Take an overview first, then close-ups that show each issue in context.
Store these photos with the job record. Record the date, location within the work area, and any concern discussed with the customer. If an issue affects the proposed work, resolve the scope before starting.
Photos support a clear discussion about existing conditions; they do not guarantee protection from a dispute. Keep them alongside your inspection notes and agreed scope.
Separate internal documentation from marketing permission. A photo taken for a job record is not automatically approved for public advertising.
Agree on marketing photos before recording
Ask the customer before using photos of their property in marketing.
Explain where you intend to publish them: your website, social pages, printed materials, or another channel. Record their agreement and any restrictions.
Check the frame for:
- People who have not agreed to appear
- House numbers and identifying signs
- License plates
- Customer paperwork
- Security or access details
- Reflections showing private areas
Change your position to avoid these details. If necessary, blur identifying information in the publication copy while keeping the original in the internal record.
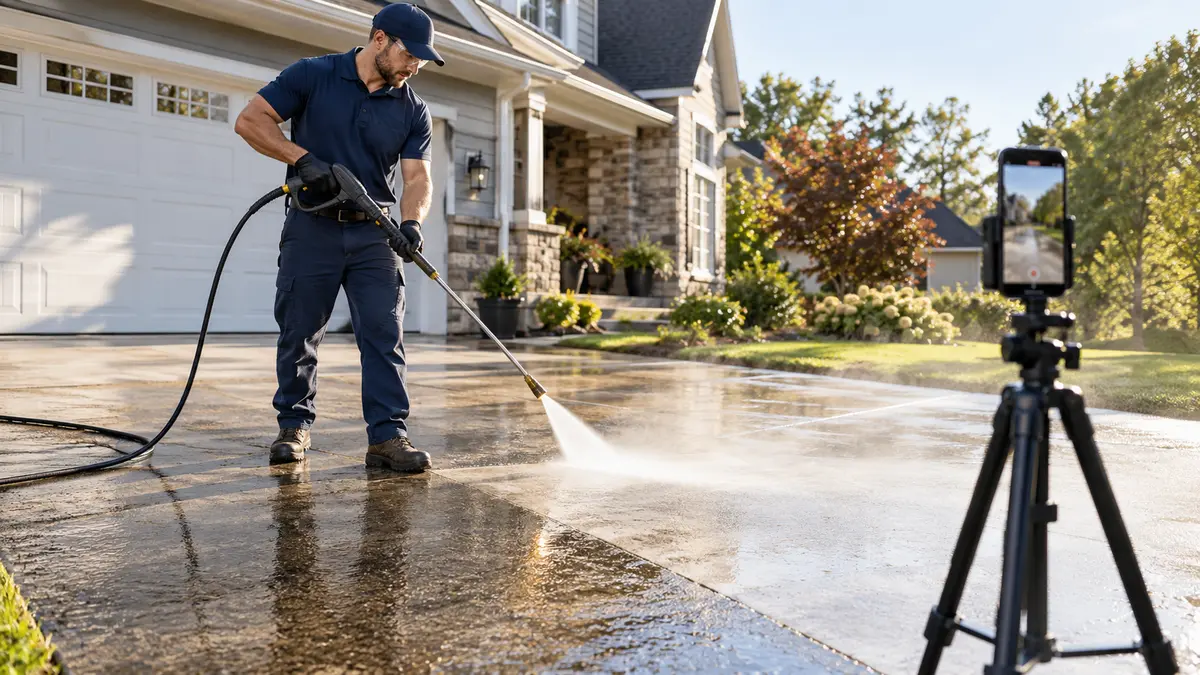
Assign recording to someone who can stay clear of active work. The equipment operator should focus on the job. Set up any stationary camera without blocking access or creating a trip hazard.
Set up your phone camera
A phone can produce useful marketing photos. Establish a simple setup your team can repeat.
Clean the lens
Wipe the camera lens with a suitable clean cloth. Fingerprints and spray can make an otherwise sharp image look hazy.
Check the lens again if the phone has been near mist or water.
Turn on the grid
Use the camera grid to line up paving joints, walls, and other fixed references.
This helps keep the frame level and makes it easier to repeat the angle afterward. Avoid using a tilted frame for one image and a straight frame for the other.
Set focus and exposure
Focus on the surface you want to show, then check that bright areas still contain visible detail.
If your camera supports it, lock focus and exposure during a short sequence so the brightness does not shift between shots. On iPhone, touch and hold the focus area until AE/AF Lock appears; see Apple’s camera tools guide.
Recheck the settings when the lighting changes. A locked setting is not a substitute for comparing the images.
Watch the light
Avoid harsh midday shadows when scheduling allows. A large shadow across half the driveway can hide the condition you want to show.
If the job takes place in difficult light, choose a view that makes the surface readable and note major differences between the before and after images.
Capture landscape and vertical versions
Take each planned view in both orientations.
A landscape image gives you space for a website gallery or quote document. A vertical image gives you more flexibility for a 4:5 feed design or 9:16 story or reel.
Leave space around the main subject for cropping. Keep original files and preview each exported version in its destination, including Google Business Profile.
Capture three useful views
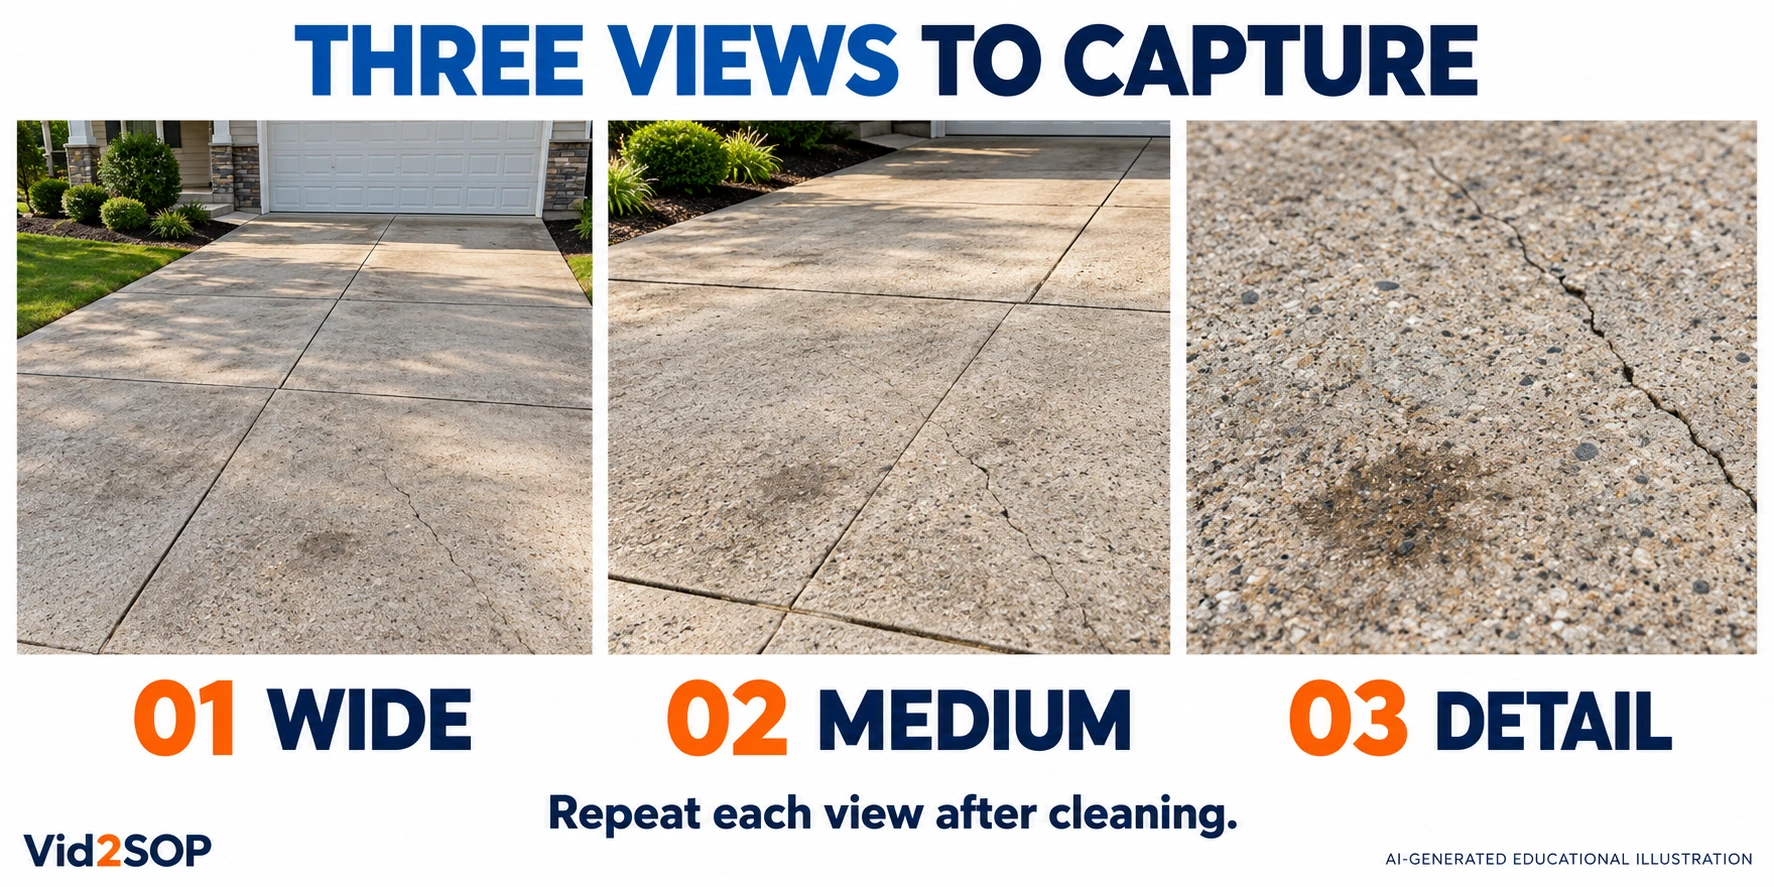
Plan three matching views before the work begins.
1. The wide view
Show the full work area and enough context to understand its shape.
For a driveway, include its edges and the direction toward the property. For an entrance, show the approach without exposing unnecessary private details.
The wide view explains the scale of the project.
2. The medium view
Frame the main section where the change is easiest to compare.
This often makes the strongest side-by-side pair because the surface remains recognizable while the reader can inspect the result.
Choose a section that represents the work, not an unusually clean patch.
3. The detail view
Capture texture, a particular stain, or another condition that disappears in the wider image.
Include a recognizable reference so the matching after photo is easy to identify. If a mark remains, the detail view can help explain the outcome honestly.
Repeat all three views after completion. Check the pairs before leaving so a missing angle does not become tomorrow’s problem.
Make the camera position repeatable
Use a fixed reference to find your position again: a paving joint, path edge, or another visible feature.
Write a short camera note:
“Wide view from the front path, facing the garage. Phone at chest height, main camera, landscape.”
Keep these details consistent:
- Camera height
- Distance from the surface
- Direction
- Lens or zoom setting
- Orientation
- Position of the surface within the frame
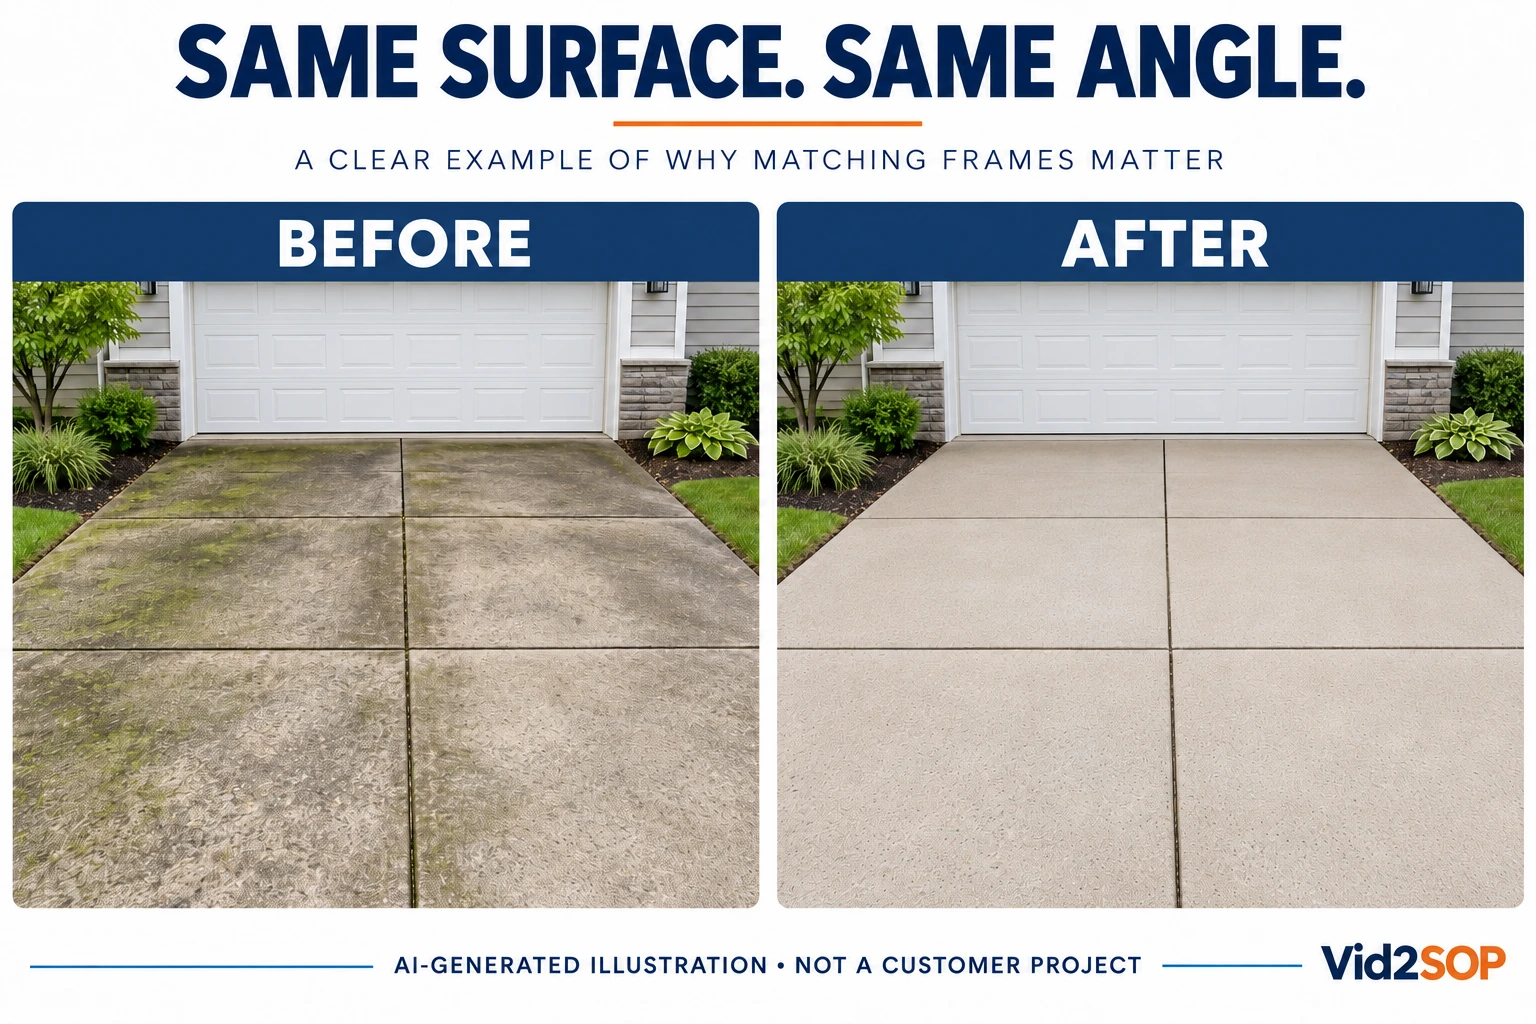
Use the before image as a reference when taking the after photo. Match the edges and background features before pressing the shutter.
For a team, label the positions A, B, and C in the job note. Another technician should be able to understand where each view was taken.
A close before photo paired with a distant after photo makes the comparison weaker. Matching frames let the surface explain the change.
Add the half-clean shot
Capture one frame showing the boundary between a cleaned section and an uncleaned section of the same surface.
This shot shows the contrast within a single image, so it does not require a separate matching after photo. It can make a useful cover image or opening frame for a short video.
Take it during a planned pause in the work. Keep the camera clear of equipment and do not interrupt the operator to stage the image.
Show enough surrounding area to make the comparison understandable. Label it “During cleaning” so readers do not mistake the partly completed surface for the finished job.
Complete the agreed work afterward. The half-clean shot documents progress; it does not replace the final inspection or completed-job photos.
Check lighting and surface moisture
Wet paving can look darker than dry paving. Direct sunlight and shade can also change how a surface appears.
Compare images under similar conditions whenever you can. If the after photo is taken while the surface is wet, say so clearly:
“Same driveway before cleaning and immediately after completion. The surface is still wet in the second photo.”
If the customer permits a later visit, a dry after photo can provide another useful view. Keep the timing clear rather than replacing one image without updating its description.
Never edit, filter, or mismatch photos to exaggerate a result. Do not darken the before image, brighten the after image selectively, or remove remaining marks.
Straighten and crop publication copies consistently. Keep the originals so the team can review the comparison.
Build a clear before-and-after layout
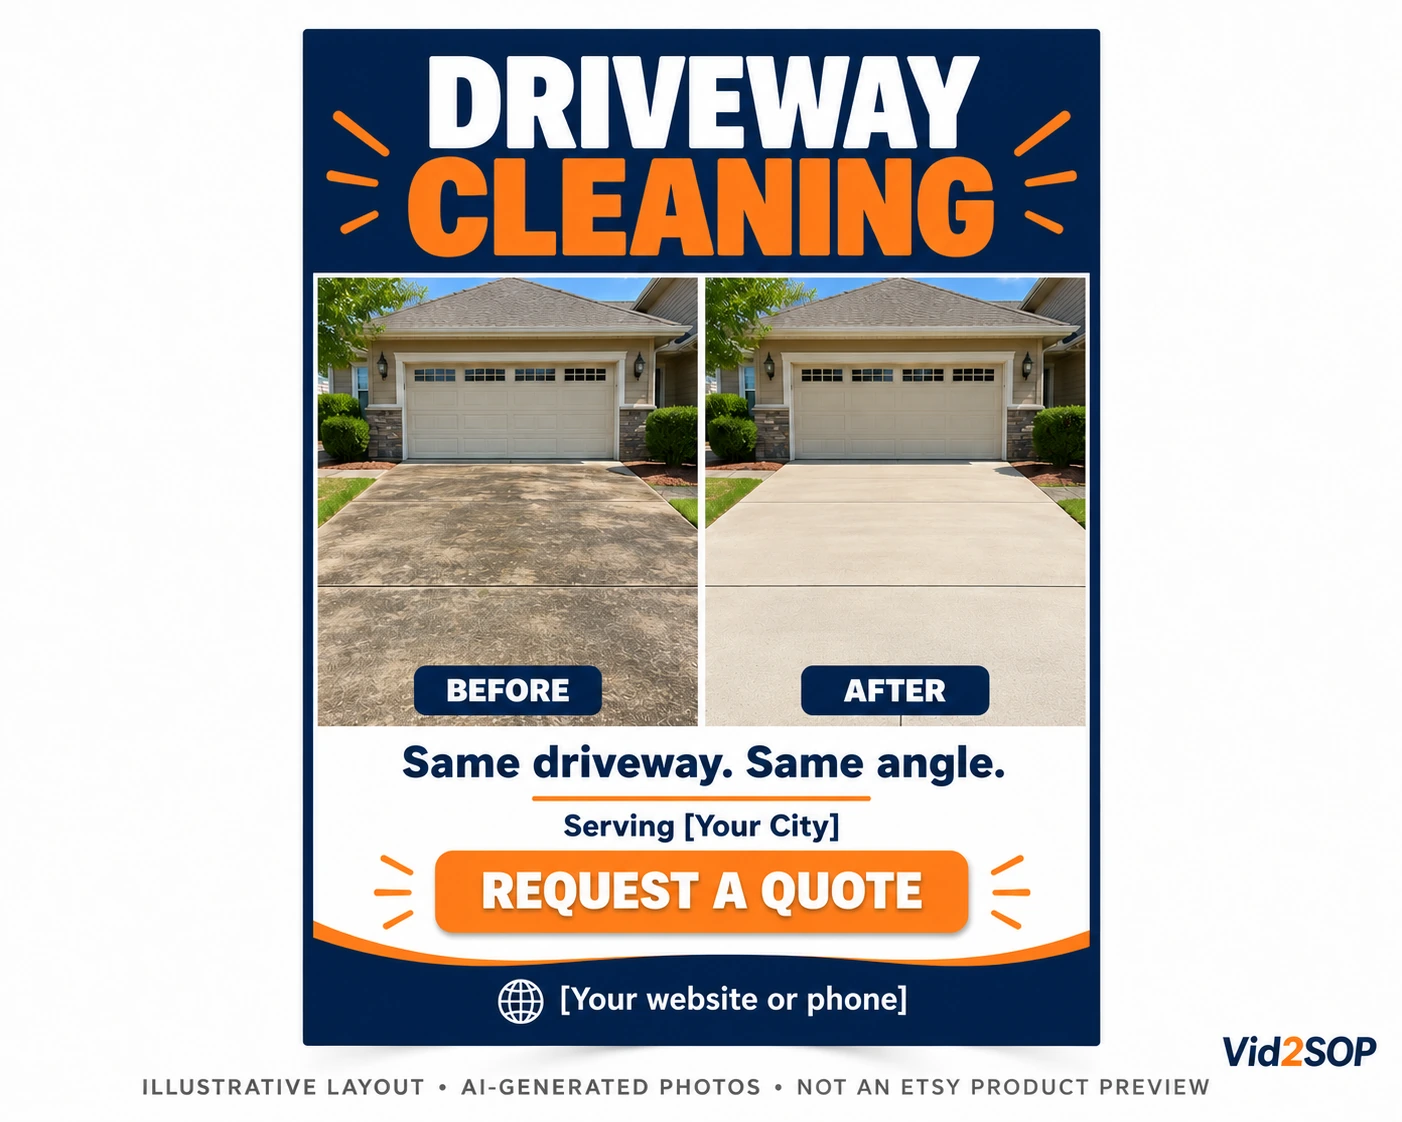
Place matching images together and label them:
Before cleaning | After cleaning
Use equal-sized frames and similar crops. Keep labels away from the surface details readers need to inspect.
Below the images, add a short service description:
“Driveway cleaning in [City]. Same section before and after the agreed work.”
Then add one call to action:
“Request your driveway cleaning quote.”
Include a readable contact method. Avoid crowding the design with several offers, oversized logos, and competing instructions.
For editable social designs and captions, see the Pressure Washing Canva Marketing Kit on Etsy. Customize the templates with your own approved photos, service information, and contact details.
Disclosure: Vid2SOP and Local Growth Studio are related brands. The linked digital product is from our Etsy shop.
Preview the finished design on a phone. Check that viewers can identify the before image, understand the service, and find the next step without zooming.
Keep a version without temporary offers so the comparison remains reusable.
Five short captions you can adapt
Replace all brackets and use each caption only when its details match the job. Do not claim improved safety, stain removal, or service times you have not established.
Example 1: Driveway comparison
Same driveway. Same angle. One visit.
We cleaned this driveway in [City]—swipe to see the before.
Want us to assess yours? Request a quote at [contact method].
Example 2: Patio cleaning
A fresh start for this patio in [City].
We cleaned [the agreed area] ahead of [the customer’s planned use]. The second photo was taken while the surface was still wet.
Ask us about your patio: [contact method].
Example 3: Commercial entrance
First impressions start at the door.
We cleaned this business entrance in [Area] before opening.
Managing a similar property? Let’s discuss the work and a suitable service time: [contact method].
Example 4: A remaining mark
Cleaner surface. One mark still visible.
We completed [service], but [mark] remained. We discussed the result with the customer rather than editing it out.
Ask us what to expect for your surface: [contact method].
Example 5: Half-clean progress image
Halfway through. The difference is already visible.
We’re cleaning this [surface] in [City]. This is a progress photo; the completed result follows in [the next slide or post].
For local cleaning inquiries: [contact method].
Add a short video
Use a reveal pass to show the same area before and after, keeping the camera movement similar in both clips. A stationary timelapse can show progress without someone walking through the work area. A same-angle transition switches between matching frames and makes the change easy to follow. Keep labels visible and explain any difference in lighting or moisture.
For more formats and captions, see our pressure washing social media post ideas.
Turn one project into several useful posts
Give each piece of content a different purpose.
| Content | What to show | What it explains |
|---|---|---|
| Before-and-after comparison | Matching views | The visible result |
| Half-clean progress post | Cleaned and uncleaned sections in one frame | The change during work |
| Project overview | Wide view and service description | The project scope |
| Customer question | Detail photo with a factual answer | What affects the outcome |
| Process post | Preparation or inspection image | How your team approaches the job |
| Service invitation | Clear result and contact details | How to request similar work |
Avoid publishing the same comparison repeatedly with only a new headline. Use the project to answer different questions.
Keep the complete internal record separate from selected marketing images. Public posts need an accurate description, not the customer’s private job information.
Where to use the photos
Google Business Profile
Use approved project photos to show the work your business performs. Include recognizable service context and check the image preview after uploading.
Your website gallery
Organize examples by service or surface. Give each project a short description and a route to the relevant quote request.
Quotes and estimates
Include a relevant example to explain the proposed service. State that it is a previous project, not a promise that another property will produce the identical result.
Flyers and door hangers
Choose a comparison that remains readable at print size. Add your service area and one contact method.
Social posts
Use the appropriate crop for the placement. Keep the labels and main result clear of interface overlays.
Track where each approved image is used so updated contact details or expired offers can be corrected.
Make the next step match the service
A driveway post should lead to a straightforward driveway inquiry.
Ask for the property’s general location, the area requiring cleaning, access information, and any specific concerns. Invite customers to send photos they can take safely.
Customer photos help you understand the request, but they may not show every condition affecting the scope. Confirm what you need before committing to the work.
Keep the service name, area, and contact details consistent across the post and response page.
Avoid these common mistakes
Taking only the finished photo
Add before photos to the job checklist. Marketing cannot recover a starting condition that was never recorded.
Pairing different surfaces
Keep matching files under the same project identifier. Never combine two unrelated jobs as one transformation.
Hiding remaining marks
Use representative images and explain relevant limitations. A realistic result builds a more useful expectation than a manufactured one.
Publishing private details
Review the public copy separately from the internal record. Permission and privacy checks should happen before the post is scheduled.
Reusing an expired offer
Place temporary promotions in a separate text layer. Check dates and terms whenever the design is reused.
Presenting generated images as completed work
Generated images can illustrate a layout when identified clearly. Use genuine project photos as evidence of work your team delivered.
Organize files for reuse
Use names that connect the image to the job without exposing customer names or addresses:
2026-10-04_driveway_project-023_before-wide.jpg
2026-10-04_driveway_project-023_after-wide.jpg
Create one project record containing:
- Internal project identifier
- Service and completion date
- Existing-condition photos
- Marketing permission and restrictions
- Matching before-and-after pairs
- Caption notes
- Approved publication copies
- Publication channels and dates
Give the person preparing posts the approved images and necessary service details. Keep private customer information in the restricted job record.
Preserve original files separately from cropped, labeled, or blurred copies.
Track inquiries and booked work
Record the post identifier, publication date, channel, contact method, relevant inquiries, quotes, bookings, and completed paid jobs.
Ask customers how they found you. If they cannot remember, record the source as unknown rather than assigning it to your latest post.
Website clicks, inquiries, bookings, and payments are different outcomes.
For example, a post might generate eight quote-page visits, three inquiries, and one completed job. Those figures describe a sample funnel, not an expected result.
Review whether the inquiries match your service area and advertised scope. Also track the time spent preparing content.
A post with modest attention can still be useful if it brings suitable work. Use actual results to decide which surfaces, captions, and channels deserve another test.
Use project recordings to support team training
Marketing photos show the outcome. A recording of a well-run job can help explain the process that produced it.
With permission, record preparation, the work sequence, and final inspection. Keep filming clear of active work and private customer information.
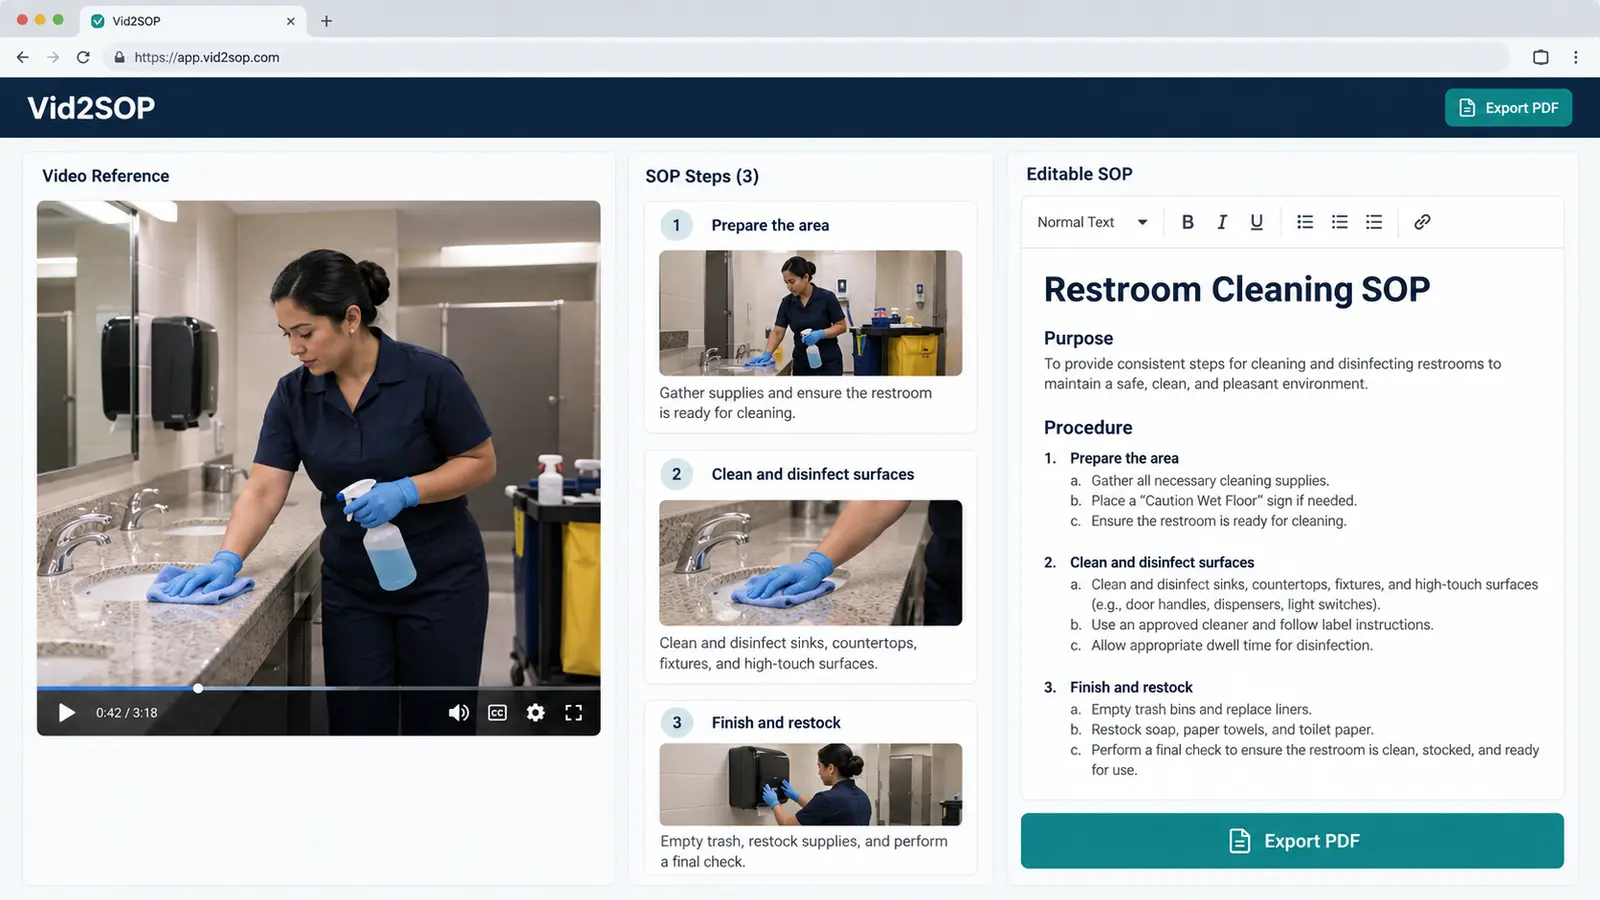
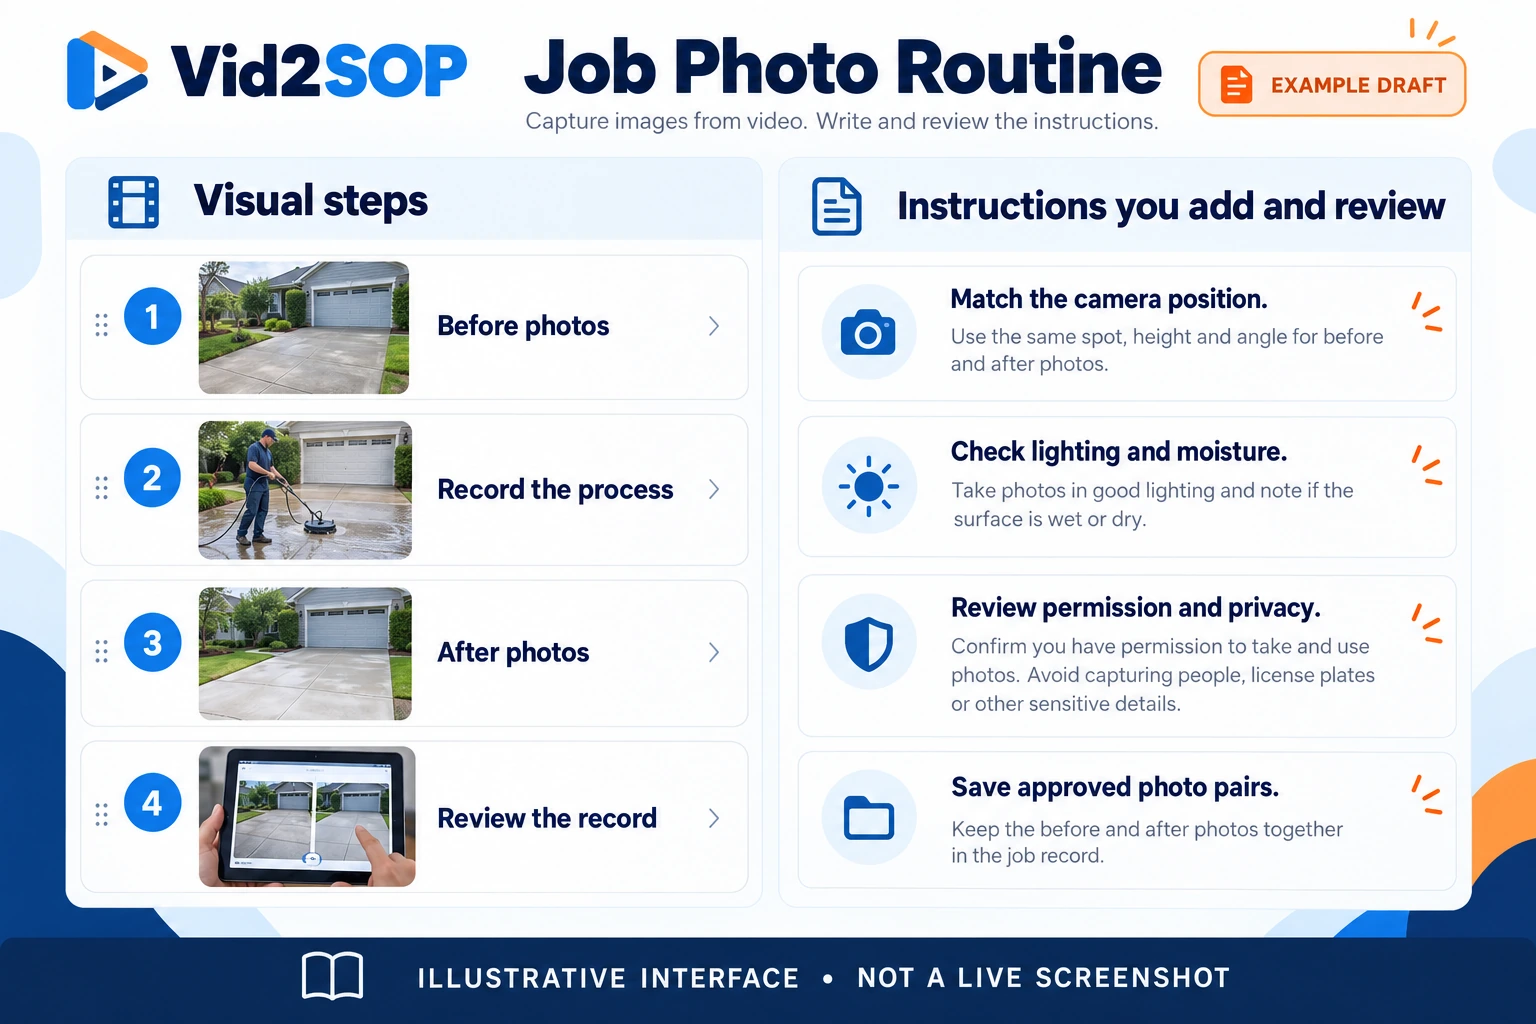
Upload the recording to Vid2SOP to capture images into an editable visual draft. Add and review the written instructions yourself. The current version does not transcribe speech or automatically write the procedure.
Include these checks:
- Confirm the agreed scope.
- Take the before photos and document existing conditions.
- Identify when to stop and ask for guidance.
- Prepare the work area.
- Follow the approved method.
- Inspect the completed work.
- Capture matching after photos.
- Record exceptions and publication permission.
Have an experienced team member review the guide before using it in training. Update it when equipment or methods change.
An SOP supports supervised training. It does not replace equipment instructions or appropriate safety instruction.
Frequently asked questions
Do I need a professional camera?
Start with a phone and a repeatable routine. Upgrade equipment when your actual image requirements justify it.
Should the after photo show a wet or dry surface?
Aim for comparable conditions. Clearly label a wet after photo or another important difference.
How do I take a half-clean photo?
During a planned pause, frame cleaned and uncleaned sections together from a safe position. Label it as work in progress.
Can I use these photos in Canva?
Yes, with the necessary rights and permission. Check the crop, labels, and contact details before publishing.
What if stains remain?
Show the actual result and explain the relevant limitation. Do not remove stains digitally.
How many photos should I take?
Start with matching wide, medium, and detail views in landscape and vertical. Add existing-condition close-ups and a progress image when useful.
Make the photo routine part of every job
Assign responsibility before arrival. Capture existing conditions, record camera positions, and check matching after images before leaving.
Review permission and privacy before preparing marketing copies. Publish a clear comparison, explain the service, and track the inquiries it brings.
Use your photos to show customers the result—and use reviewed project recordings with Vid2SOP to help your team repeat the process.
Put your process into practice
Use your photos to show customers the result—and use reviewed project recordings with Vid2SOP to help your team repeat the process.
Create your SOP